MiniRobotLanguage (MRL)
CAP. Command
Capture Screenshot
Intention
This command will capture a Screenshot from a specified part of a window or the complete Computer-Screen.
1. Capture Screenshot of complete Desktop into Clipboard
This will include all Screens on a Dual-Screen System.
CAP.Source=desktop;Target=clipboard
ITO.
DBP.Desktop Capture failed!
EIF.
ENR.
2. Capture Screenshot of complete Desktop into a file
This will include all Screens on a Dual-Screen System. They will be saved as a single ".bmp" (BItmap-) File. You can currently not choose any other picture-format then "-bmp".
VAF.$$FIL=?desktop\Screenshot.bmp
CAP.Source=desktop;Target=file|$$FIL
ITO.
DBP.Desktop Capture failed!
EIF.
ENR.
3. Capture Screenshot of complete Desktop into a variable
This will include all Screens on a Dual-Screen System. They will be saved as a single Screenshot into the given Variable.
CAP.Source=desktop;Target=var|$$VAR
ITO.
DBP.Desktop Capture failed!
EIF.
LEN.$$VAR|$$RES
DBP.Size of Picture is $$RES Bytes.
ENR.
4. Capture Screenshot of actual window into Clipboard/file/variable
If you just locate any window, or child window, you can take a screenshot into the System-Clipboard.
STW.ct|#32770|Basic-NAV Matrix 02
CAP.
ENR.
By using the Prototype "Target=file" or "Target=var" you can direct the output wherever you want it to go.
Capturing a window, you will see that only the so called "Client Area" is captured. That is the Area where the program draws its controls. The Title-bar and the window border (that is the so called "Non Client Area") is been clipped.
5. Capture Screenshot of actual window with Frame/Non Client Part
To capture the complete window, that includes the "Non-Client" Part of the window, use the "Frame=" Prototype. You can choose between
Frame=Full Frame=Title


Like this:
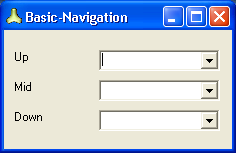
STW.ct|#32770|Basic-NAV Matrix 02
CAP.frame=full
ENR.
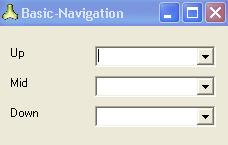
If you omit the "Frame=" or if you specify "Frame=no border", then you get the Snapshoot of just the Client-Area, like this:

Frame=no Border (default)
6. Capture Screenshot using Screen-Coordinates
To capture a screenshot using Screen-Coordinates, you can specify this:
CAP.Source=Screen-Coords|100,150,200,250
or something like this:
$$FIL=?desktop\Screenshot.bmp
CAP.Source=Screen-Coords;Target=File|100,150,200,250|$$FIL

Then you will get a Screenshot from these screen-coordinates. Screen-Coordinates should be avoided in most places. Prefer using Window-Coordinates instead.
7. Capture Screenshot using Window-Coordinates
To capture a screenshot using Window-Coordinates, you can specify this:
STW.ct|Form1_Class|Basic-Navigation
CAP.Source=Window-Coords|100,150,200,250
or if you want to use a file:
$$FIL=?desktop\Screenshot.bmp
STW.ct|Form1_Class|Basic-Navigation
CAP.Source=Window-Coords;Target=File|10,15,100,200|$$FIL
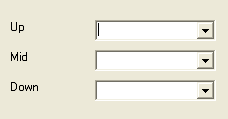
Note that internally the Window-Coordinates are been converted to Screen-Coordinates, and the screenshot is taken from the desktop. Therefore, if the given Area is larger then the window, you will see what was behind in the screenshot.
Here is the picture from the example above:

8. Capture Screenshot specifying a window-handle
To capture a screenshot using a resolution independent, yet defined part of a window, you can use Quadrant coordinates (A1-D4) like this:
' Will place the scrrenshot in the Clipboard
STW.ct|PBWindowClass:0|BCS - Testform
CAP.Source=wc|{D1,D4}
ENR.

You can combine these Prototypes, to snapshot to a file or to a variable.However any "Frame=" Prototype will be ignored in this case. Instead the Full window is taken as base-area.
Syntax
CAP.P1|P2[|P3][|P4]
Parameter Explanation
P1 - Prototype-String in readable format can contain this values:
Source=
- handle - use a window handle in P2. Use P3 for Target.
- window - will use actual child- or topwindow or selected object. P2 is for target,
- desktop - will make a snapshoot of the complete desktop. P2 is for target,
- screen-coords - You can give screen-coordinates in P2. Use P3 for Target.
- window-coords - You can specify window-coordinates or Quadrants in P2.
Use P3 for Target.
Frame=
- no Frame
- Full
- Title
Target=
- Clipboard - You can paste the content of the Clipboard directly into your
favorite graphics or office program.
- File - you need to specify a complete file-path and name in the last
(Target-) Parameter.
- Variable - Use this, if you need the binary data from the screenshot in a variable.
For example to do yourself a color-analysis.
Putting a Screenshot inside a Variable will produce a Variable with this format insider the Variable:
- 8 Byte (4 Byte X- and 4 Byte Y-Size Information)
- XSize * YSize * 4 Byte Color-Information (4 Byte per Pixel)
This format is not compatible with the RRA.-Bitmaps, as these are prefixed with 8 Bytes of Origin-Positional Information.
Depending on the given Text-Prototypes, the other parameters may or may not be needed.
P2 - (optional) - In case that a handle, or any sort of coordinates need to be specified, these will be in P2. Any additional Target-Parameter like Filename or Variable will then be in P3. If P2 is not needed for the Source, the P2 will hold the Destination Parameter and P3 is not needed. In case you use "Source=window" then you can specify resolution independent Quadrant-Coordinates at this place.
CAP.Source=wc|{D2,D4}
Doing so will however make the robot ignore any given "Frame=" Prototype. In this case the "Frame=Full" will automatically be used.
P3 - (optional) - Holds the Target variable, if P2 is needed to specify the Source (Coordinates, handle). Then P3 will hold the Destination value (Variable-Name, File-Name). In case the Source does not need any specifications, then P2 will hold the Target-Information and P3 must be omitted.
Example
'***********************************
' CAP.-Sample
'***********************************
CAP.Source=desktop;Target=var|$$VAR
ITO.
DBP.Desktop Capture failed!
EIF.
LEN.$$VAR|$$RES
DBP.Size of Picture is $$RES Bytes.
ENR.
Remarks
Putting a Screenshot inside a Variable will produce a Variable with this format insider the Variable:
- 8 Byte (4 Byte X- and 4 Byte Y-Size Information)
- XSize * YSize * 4 Byte Color-Information (4 Byte per Pixel)
This format is not compatible with the RRA.-Bitmaps, as these are prefixed with 8 Bytes of Origin-Positional Information.
You can display the saved bitmaps, using the UCV.-command.
$$FIL=?desktop\Screenshot.bmp
STW.ct|Form1_Class|Basic-Navigation
CAP.Source=Window-Coords;Target=File|10,15,100,200|$$FIL
UCV.ldi|$$FIL
PAU.5
Limitations:
If Windows is unable to reserve the Memory for the Screenshot-Operation, the operation will fail and the timeout-flag will be set. In this case you can try again with a freshly booted system. It may also help, if you just screenshot a smaller area instead of the whole desktop.
In case the Screenshot command fails (for low system resources) you will have the timeout-flag set. Otherwise it will be cleared.
CAP.
ITO.
DBP.Desktop Capture failed!
ELS.
DBP. Capture was successful.
EIF.
See also:
• 3.6 Using Quadrant-Coordinates
• ! UCV. - Undercover Graphics
• CAL. - mathematical CALculation
• IDP. / NDP. - If desktop dpi Setting
• IPC. / NPC. - If-Pixel-Colour
•